
How to Setup Commitizen and commitlint with React project
In this article, we'll see how we can add commitizen to our react project. As developers, most of the time we're expected to work in teams. And having a few best practices and standards within the teams always helps avoid unnecessary inconsistencies. We'll be looking into one such area today, and we're going to focus on Commit messages.
Date Posted : 13 November 21
Time to read: 6 mins
In this article, we’ll see how we can add Commitizen along with Commitlint and Husky to our project. As developers, most of the time we in teams. And having a few best practices and standards within the teams always helps avoid unnecessary inconsistencies. We set standards withing the team, but most of the time fall back to old practices. We’ll be looking into one such area today, and we’re going to focus on Commit messages.
Prerequisites
- Node.js
Why Structured Commits ?
“Made a change”, yes, this was an actual commit message I recently encountered in a project I was working on. This message doesn’t convey a lot, right? There’s a lot of questions that pop up, “What does the commit include?, Why was it made?, what does it change?“. Well, turns out, Every developer has his own way of writing commit messages. Some prefer writing long descriptive commit messages while some others prefer short and often not so descriptive messages (like the one above).
The problem appears when there are short, not-so-descriptive commits. Anyone who’s going through the commit history will have a hard time knowing what the commit was about and what changes it includes, just by going through the commit message.
One solution would be to have a discussion among the team members. But we’re creatures of habits, and “Old habits, die hard”. So, at some point, we keep falling back to old habits. Turns out, there’s a better way to do this.
Drumroll, Please!!
Commitizen!!!
What is Commitizen anyway?
- Commitizen is a command-line tool that helps with formatting commit messages by prompting the user to enter details which are then used to generate the commit message.
- With Commitizen, the developer will be prompted to fill out some fields while doing the commit. And only once all the required fields are specified the commit is actually made. So beautifully structured commits, every single time.
What we’re going to use
Commitizen
As already mentioned, commitizen will help us with generating the commit messages that will follow a certain format.
Husky
Husky lets us run commands or scripts before committing or pushing our code to git. It provides us with many features, but the one we’re interested in for the sake of this article is the pre-commit hook
Commitlint
Commitlint checks if our commit messages adhere to a certain commit format. Commitlint is basically like a linter that will verify if our commits follow the set standards, and will show us an error if the messages are not according to the formats.
Setting everything up
Setting up Commitlint
Lets start by installing and configuring commitlint
npm install @commitlint/{cli,config-conventional} --save-devThe above command installs commitlint CLI and the config-conventional. Now, lets go ahead and configure commitlint within our repository. Create a file called commitlint.config.js in the root of your project and paste the following code
module.exports = {
  /*
  * Resolve and load @commitlint/config-conventional from node_modules.
  * Referenced packages must be installed
  */
 extends: ['@commitlint/config-conventional'],
 /*
  * Any rules defined here will override rules from @commitlint/config-conventional
  */
 rules: {}
};
Up until now, we’ve configured installed commitlint and also configured commitlint to infer the rules from @commitlint/config-conventional set of rules by extending it in the configuration file. In the next step, lets setup our pre-commit hook using Husky
Setting up Husky
In this step, let’s install husky and configure our hooks. To install husky, use the following command.
npm install husky --save-devThis just installs husky as a development dependency. We need to do one additional step in order to make husky work. In your package.json file, add the following
"scripts":{
"postinstall": "husky install"
}
This will install husky as soon as the packages are done installing, or when the npm install is done running.
Now that thats out of the way, lets configure husky hooks. What we want to achieve is to lint our commit message before the commit is actually made. So, we’re going to issue a command (commitlint) to lint out messages when the commit-msg hook is encountered. To do this, use the following command.
npx husky add .husky/commit-msg "npx commitlint --edit $1"
Setting up Commitizen
This is the final step, where we install and configure Commitizen for our repo. Lets start by installing commitizen using the following comamnd
npm install commitizen cz-conventional-changelog --save-devOnce this is done, add the following changes inside the package.json file
"scripts":{
 ...
  "commit":"git-cz",
 ...
},
"config":{
 "commitizen":{
  "path":"cz-conventional-changelog"
 }
}
As you can see we’ve added a script called “commit” which triggers commitizen . Now, lets try running the following command. If we run the following command we can see commitizen working.
npm run commit
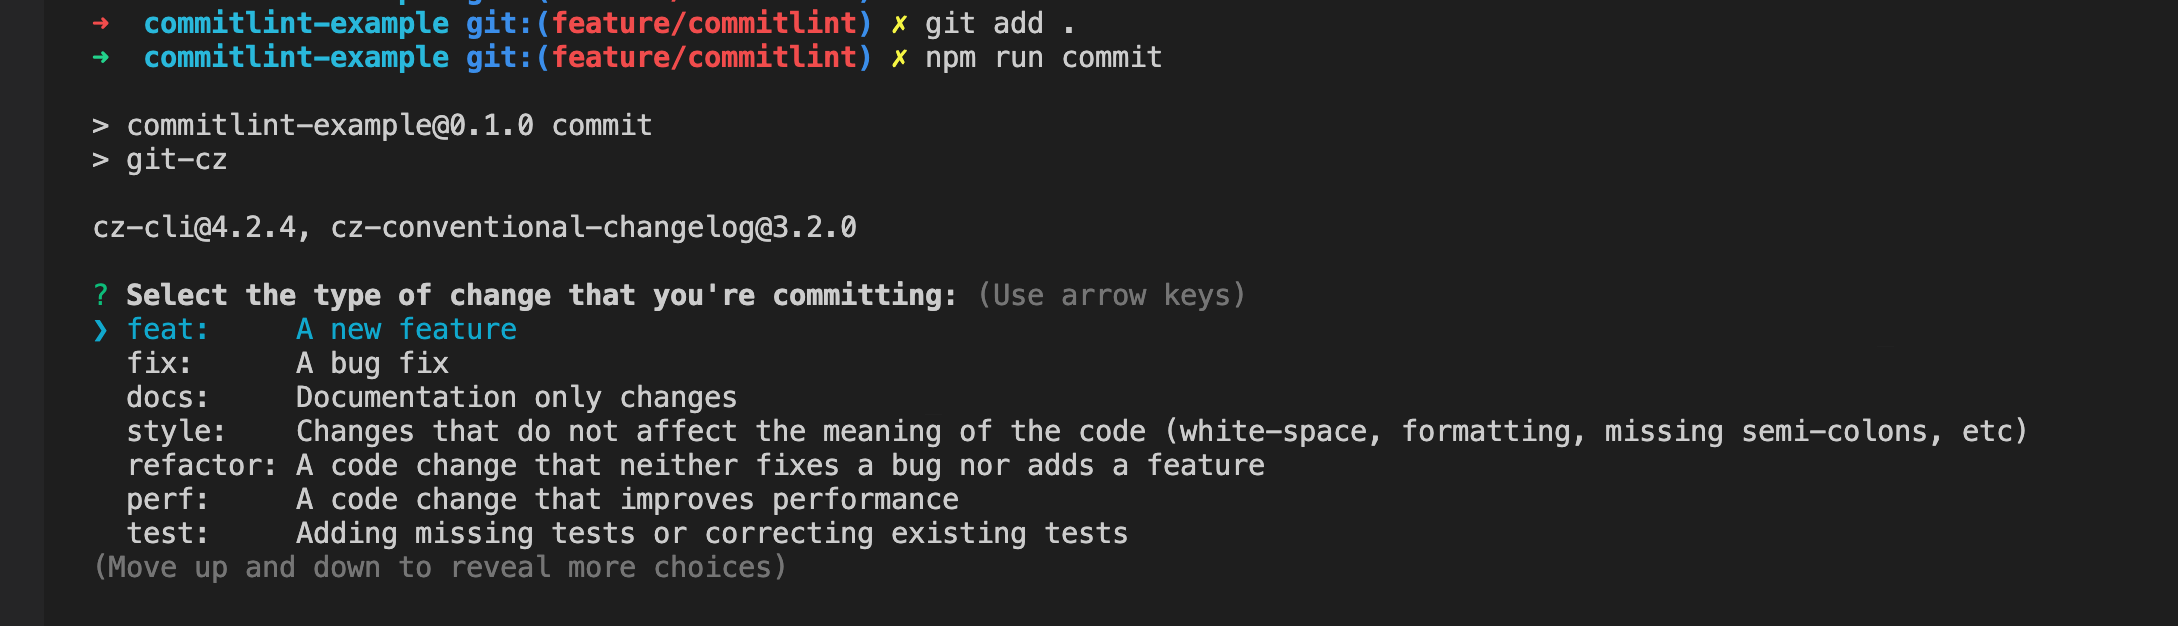
Awesome!! Now you can navigate and select from amoung the list presented and follow the prompts so the commit messages follow a certain structure. Just to give you an example this is how our commits are structured after integrating commitlint and commitizen into our project
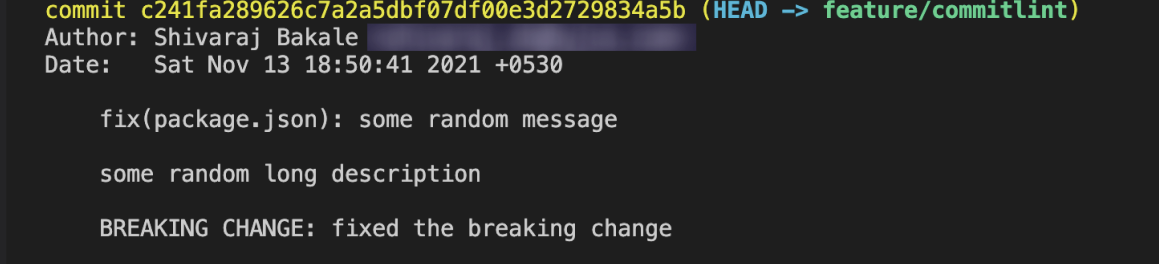
The above image shows that our commits are now structured and this structure is enforced everytime the developer makes a commit. Thank you!


Shivaraj Bakale
Diving deep from frontend waves to the backend caves 🌊🤠
React
Redux
Redux-saga
HTML